How to create a MetaMask Wallet Effectively
How to create a MetaMask Wallet Effectively
How to create a MetaMask Wallet Effectively
Do you have Zherpa tokens and can't access them? We'll show you how.
The first step is to create a MetaMask wallet to interact with our DAPP. Remember, the only way to access your tokens is through a decentralized wallet like MetaMask. The DAPP, on the other hand, is the place where you can do activities such as staking, farming, and trading tokens simply by connecting your web3 identity, that is, the wallet we will create in the following steps.

Step 1: Download the Mobile or Desktop Extension
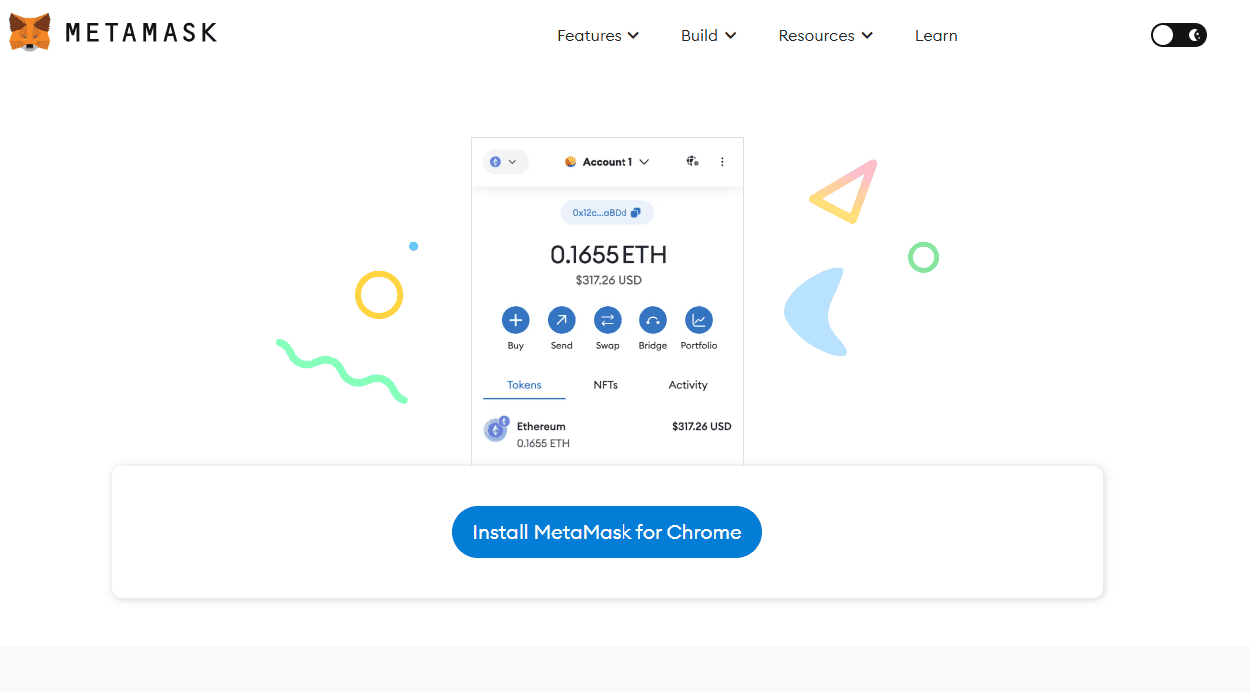
Visit the official MetaMask website: https://metamask.io/download/. It's crucial to ensure you are on the correct site to avoid downloading malicious software.
Choose your browser. MetaMask is available as an extension for Chrome, Firefox, Brave, and Edge. Select the browser you use and proceed with the installation.
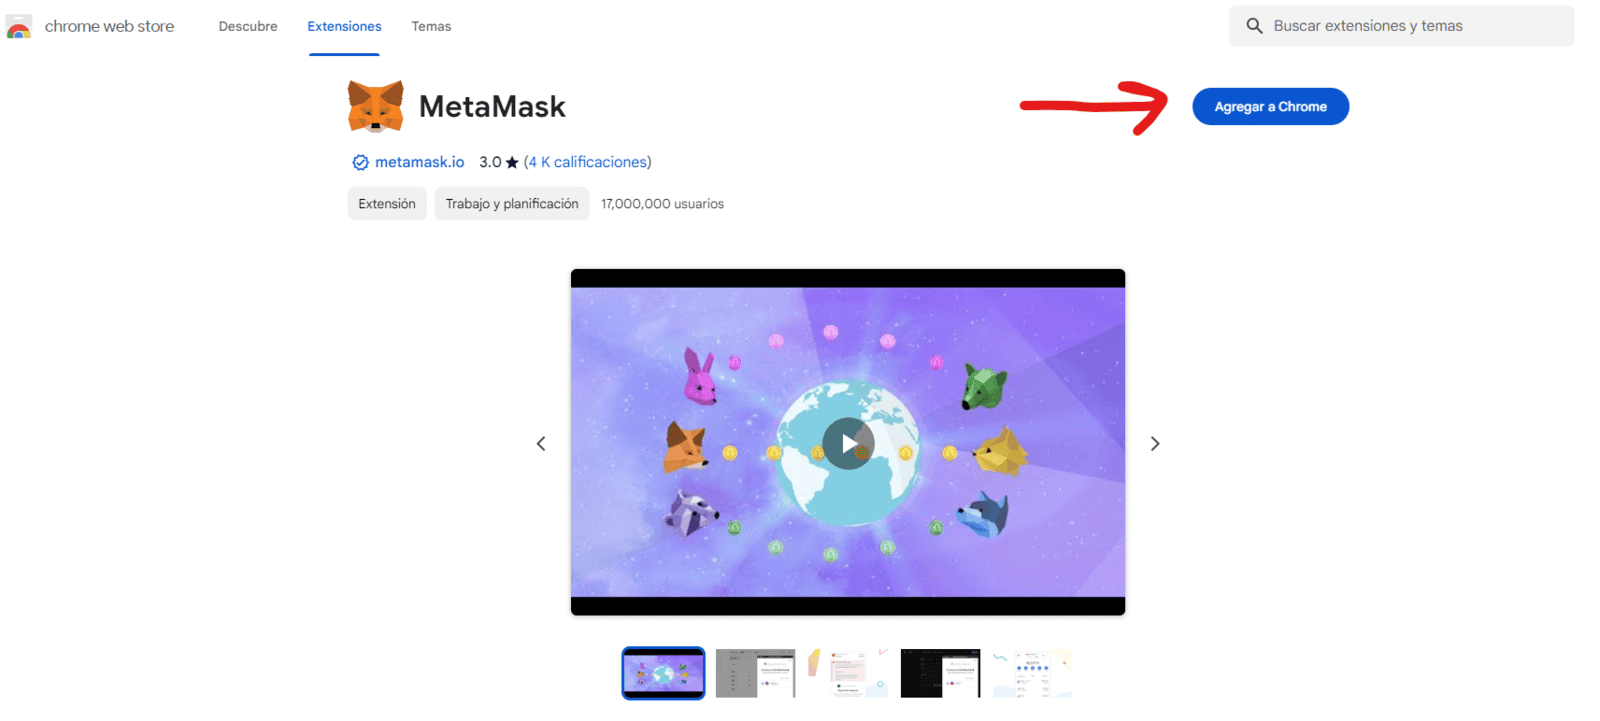
Click on "Install MetaMask". If you are using Google Chrome, after clicking, it will take you to the Chrome Web Store where you must click on 'add to chrome'.
4. If you are using Google Chrome, after clicking, it will take you to the Chrome Web Store where you must click on 'add to chrome'.
Step 2: Create Your Wallet
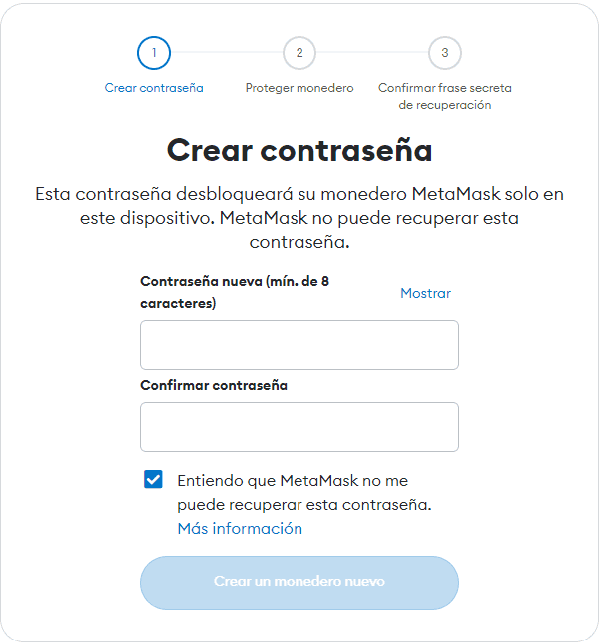
- Open MetaMask. Once installed, click on the MetaMask icon in your browser to open the application, or if you don't see it, click on the extensions menu next to it.

Step 3: Account backup
Once you've created your password, click on the "Protect my wallet" button.
Reveal your key and write down your recovery phrase. MetaMask will provide you with a 12-word recovery phrase. It is vital that you write it on paper and keep it in a safe place. This phrase will allow you to recover your wallet and access your funds from any device if you lose access to your device.
Verify your recovery phrase. To ensure you have noted it correctly, MetaMask will ask you to enter some of the words from the phrase.
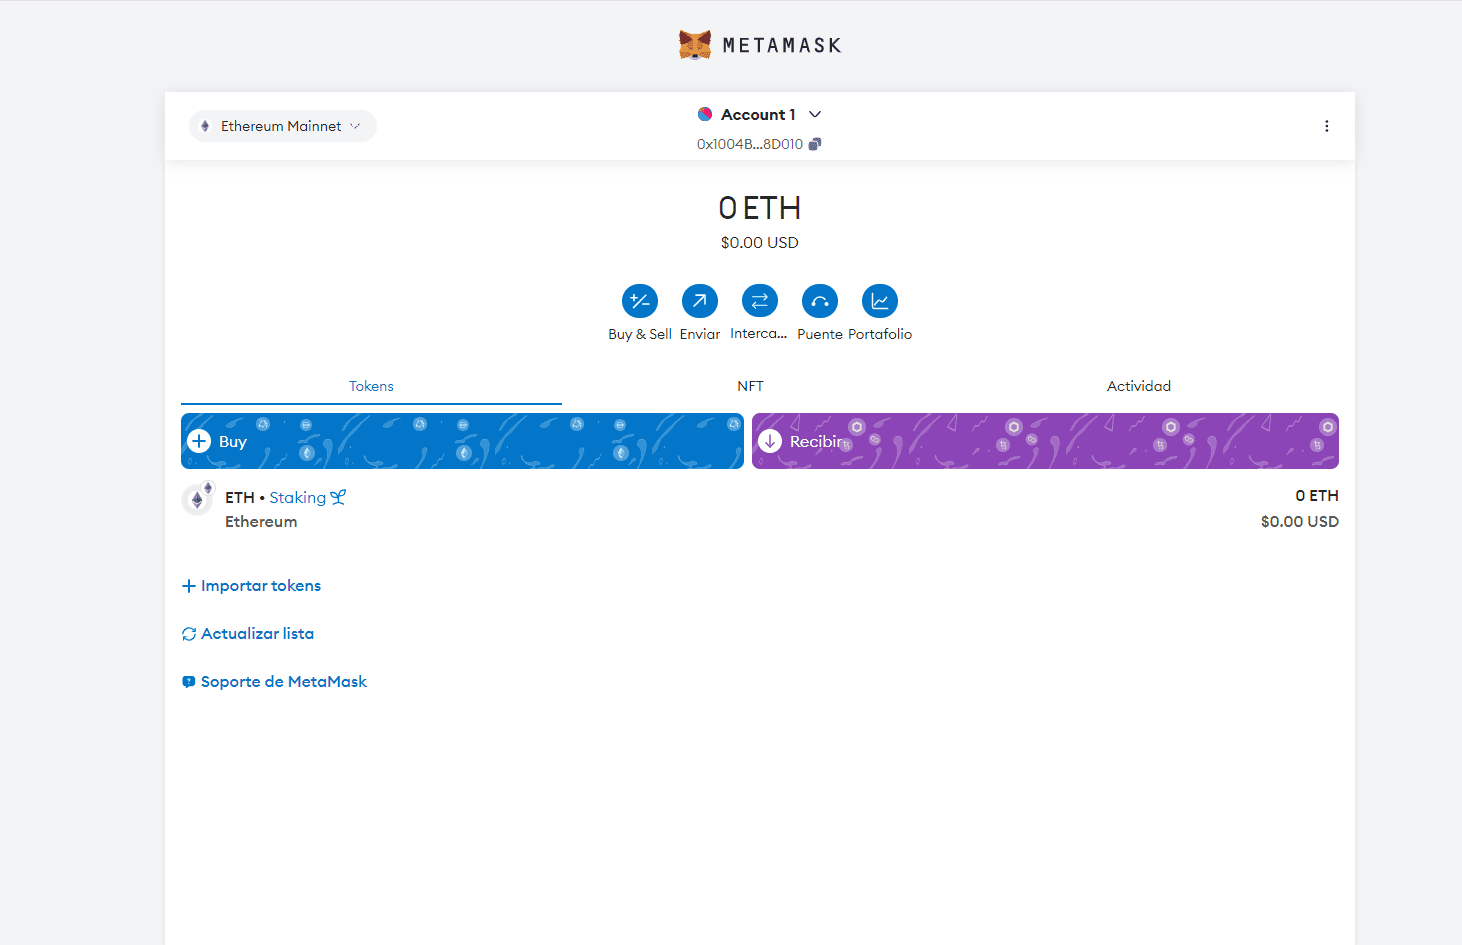
Congratulations, you have created your wallet and should see this screen:
Step 4: Final Setup and How to Add the Polygon Network
Access your wallet. Once you have completed the security steps, you will have access to your MetaMask wallet.
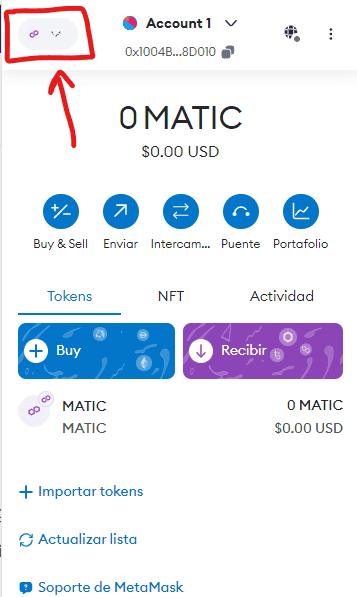
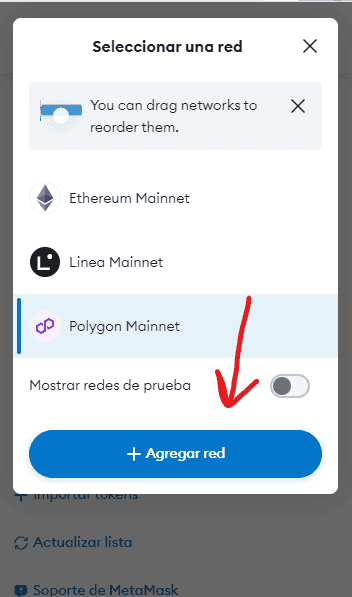
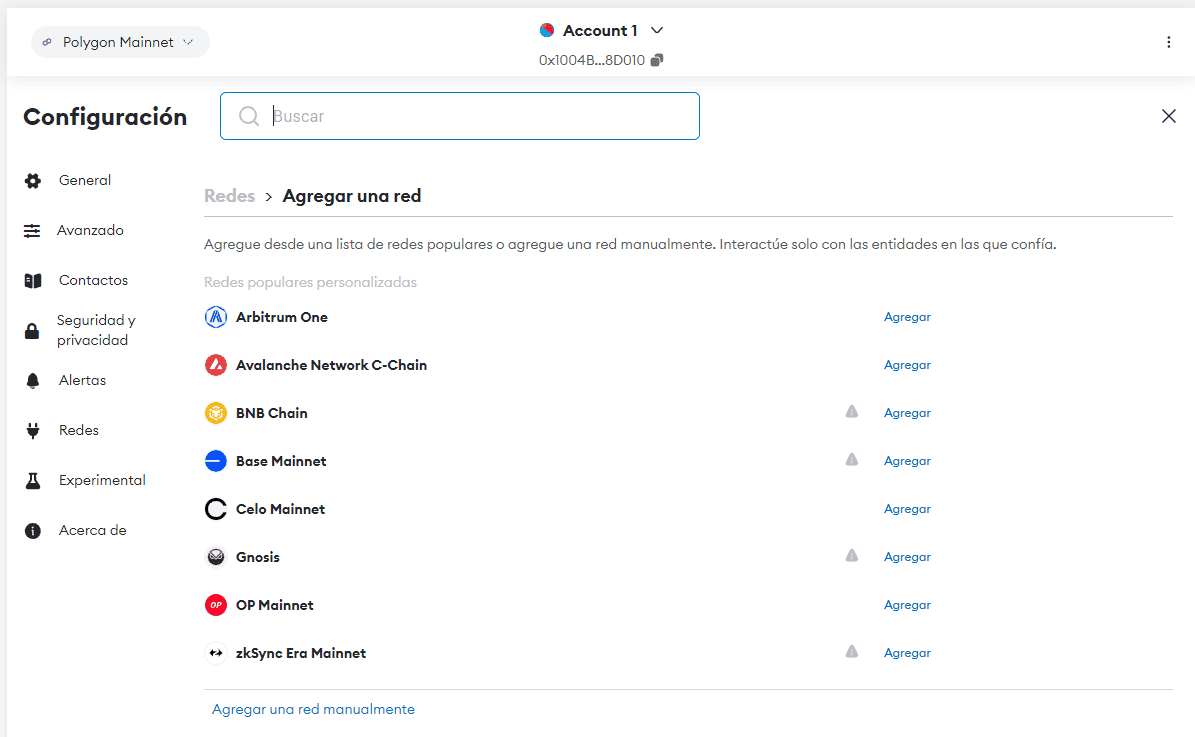
To always view the $ZHT tokens, it is important to be connected to the Polygon network. To add this network, click on the icon in the upper left corner.
Step 5: Interact with the DAPP and Add the $ZHT Token
To interact with the DAPP, the first thing you should do is go to the following address: https://dapp.zherpa.io
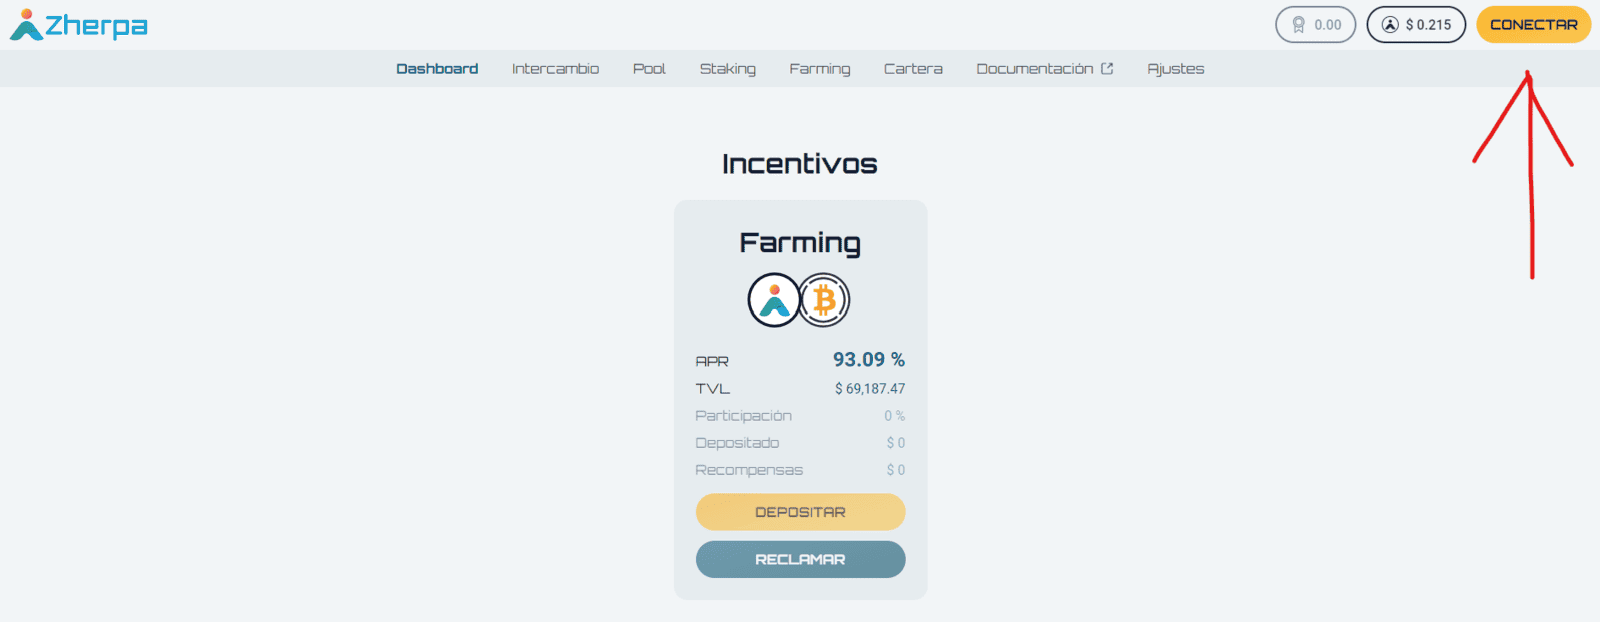
Once there, click on "connect" in the top right corner of the webpage.
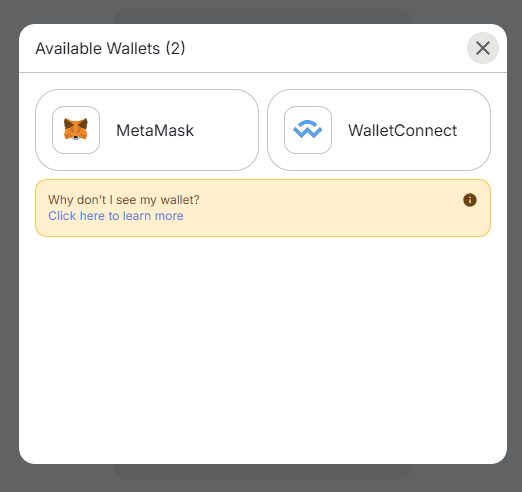
When you click on connect, it will ask you to connect a web3 wallet. Click on the option that says MetaMask. Then a dialogue box will appear, click on "next" and finally "connect".
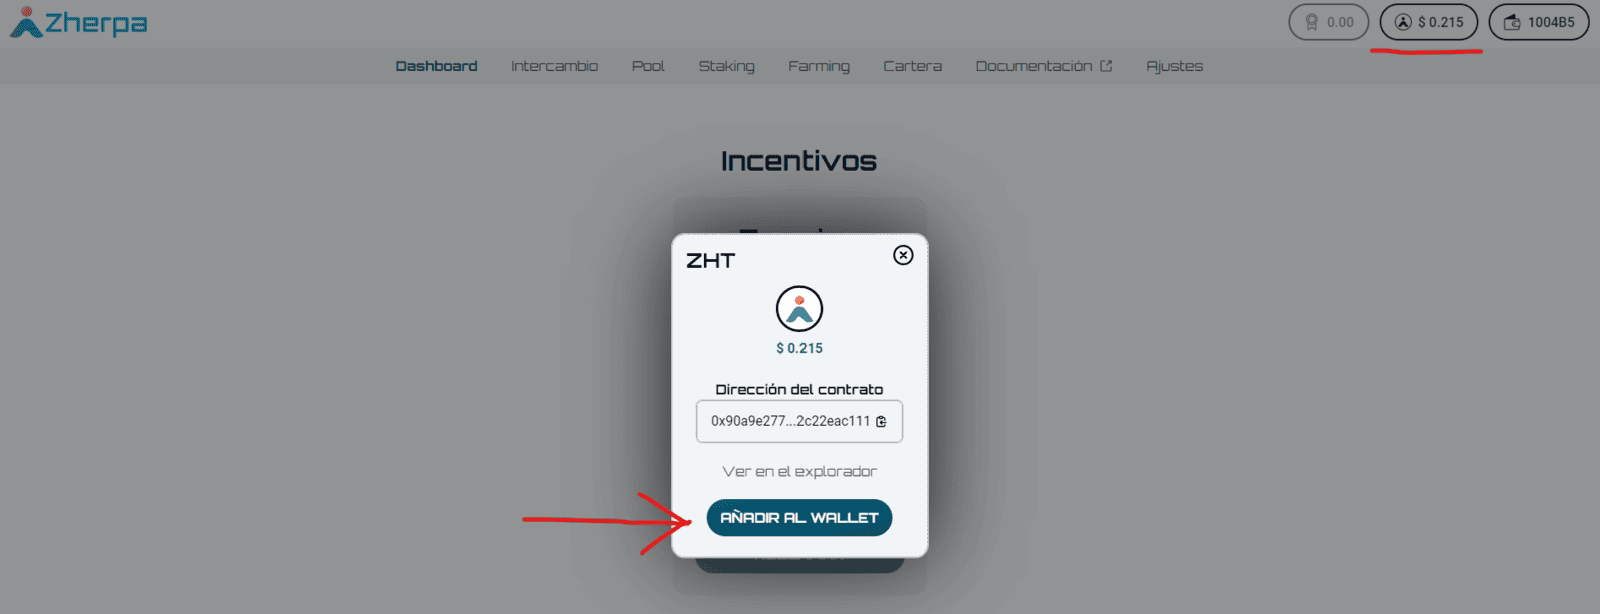
Now, for the token to be recognized by your wallet, you must add it, it's very easy. Click in the upper right corner of the DAPP, on the button that has the Zherpa symbol. Then in the dialogue box click on "add to wallet".
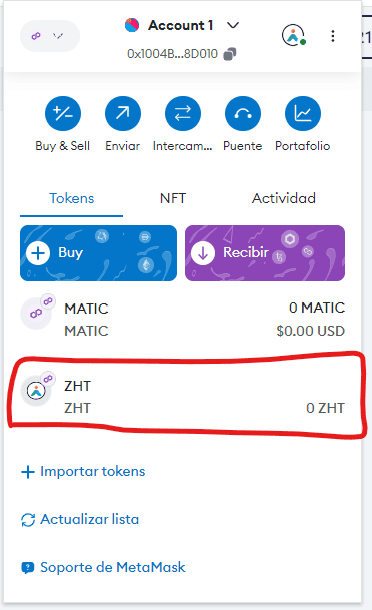
By doing so, your balance in Zherpas should appear in your wallet.
Security Tips
- Never share your recovery phrase. If someone gains access to it, they could steal your funds.
- Keep your software up-to-date. This includes the MetaMask extension and your browser.
- Consider using a hardware wallet. For added security, you can connect a hardware wallet to your MetaMask wallet.
Final Thoughts
Creating and setting up your MetaMask wallet is the first step towards exploring the world of cryptocurrencies and blockchain technology. Remember to always keep your access information secure and conduct transactions consciously. Welcome to the world of cryptocurrencies!
This guide has been adapted and simplified to facilitate understanding by beginners, inspired by the guide provided in the link. The most critical aspects for security and effective use of MetaMask have been emphasized.

